Burdock

A.K.A Gobo Root

Common Names: Beggar’s Buttons, Hardock, Burrseed, Hurrburr, Hare-burr, Cocklebur, Lappa, Gobo (Japanese), Bardane (French), Klette (German), Bardana (Spanish), Lopan (Polish)

Botanical Name: Arctium lappa

Plant Family: Asteraceae

Parts Used: Root, Leaf & Seeds

Actions: Mucilaginous, Alterative, Diuretic, Diaphoretic, Urinary Tonic, Demulcent, Bitter, Laxative, Vulnerary

Habitat: Burdock is one of the many farm/garden weeds. It’s large appearance and burr seeds give the herb a bad reputation to a more pampered landscape. Oddly enough, those who try to remove this plant can never fully get rid of it… for its long (and sometimes quite large) taproot grows in rocky soils which makes it almost impossible to completely remove.

Collection: The root is harvested in the fall of the first year… it is also the sweetest and tender to eat at this time. The leaves are best harvested in the Spring and Summer of the first year (before the plant goes dormant and begins its flowering stage during the second year). The seeds are harvested when ripe in the second year of growth.

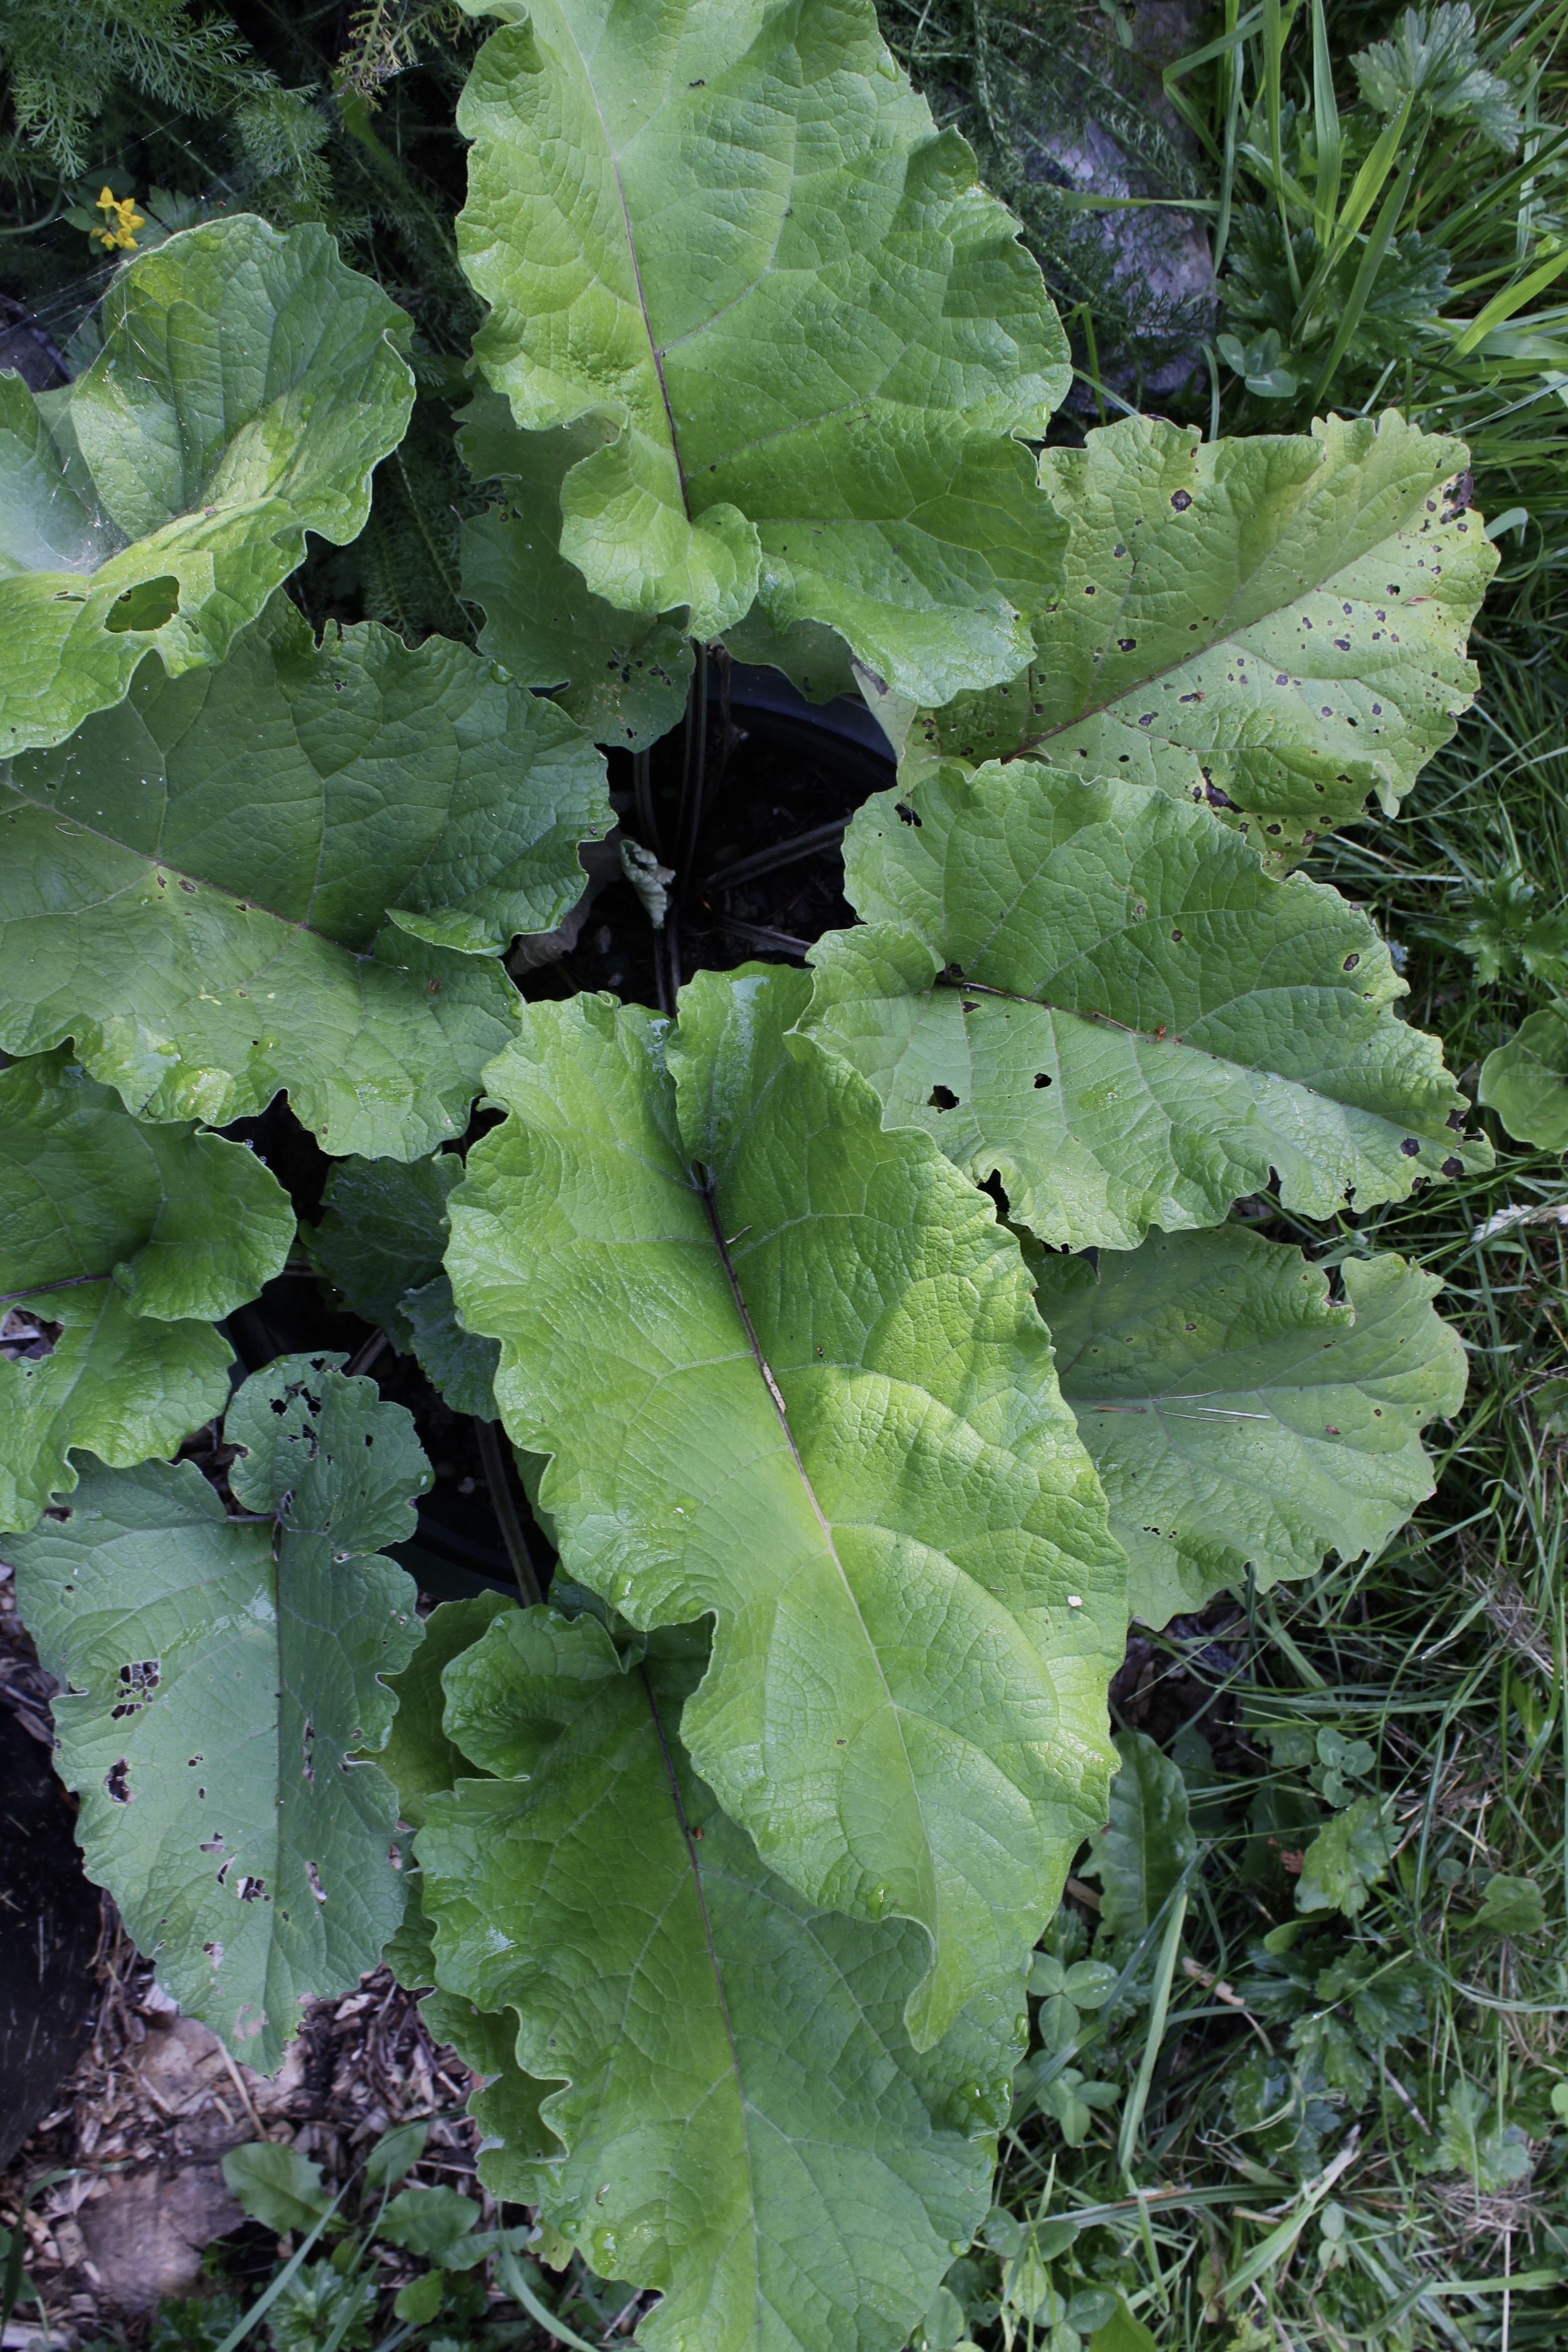
Identification:  A large leafed plant with burrs that grow in the fall and stick to you like Velcro. Burdock is biennial, meaning it takes two years to complete its life cycle. The root is harvested for medicine in the fall of the first year. During the first year, Burdock only grows leaves and there are no flowers or burrs. The root grows deep into the earth and prefers hard rocky soils, which can make it a challenge to dig up.


Burdock Medicine

Liver, Spleen & Urinary Support:

Burdock is an alterative. It helps systems of elimination and detoxification. Most noticeably, burdock helps elimination with the skin, yet it is also an aid for the urinary system and the liver.

Burdock root (high in inulin) is said to regenerate the liver cells and stimulate the gallbladder. The root and seeds are also used to “move blood” or “purify the blood” by aiding the spleen. Burdock seeds have a stronger diuretic effect. They are also said to be diaphoretics (help induce sweating). The diuretic effects help both the kidneys and urinary tract and has been known to help move stones and relieve any painful urination.


Promotes Healthy Skin:

Herbalist Jim Mcdonald explains that even though Burdock is an alterative (meaning it is cooling and drying) it can help rehydrate dry and scaly skin. Why? Burdock root and seeds alter the health of the sebaceous gland (these glands are located in the skin and secrete sebum), which in return excrete a lubricating oily substance. Sebum is an antimicrobial that helps lubricate both the skin and hair.

Burdock can address a wide range of skin conditions, including dry/scaly skin, rashes, oily skin, acne, eczema, psoriasis, etc.


Moves Stagnant Lymph:

Burdock is a lymphatic herb. Meaning it binds and removes heavy metals, chemicals and waste via the lymphatic system. It helps against sore throats and swollen lymph glands.


Nutrient Dense:

Burdock root is a super food; jammed-pack with essential nutrients. It helps strengthen the immune system, starting with the gut. Burdock root is even referred to as a prebiotic; it aids in digestion while feeding your gut flora. The root has been cited to have a total of 45-50% inulin. Inulin is a starchy carbohydrate that provides nutrients to the gut flora yet cannot be digested by humans.


Burdock Root Pickles

This recipe is from one of my herbal mentors, Eagle Song E. Gardener. Of course, it is the most rewarding after a day spent digging out as much of the root (staying intact!) with your bare hands :)

Several roots of burdock

 1/3-part tamari (or soy sauce)

 1/3-part vinegar

Garlic cloves

Fresh ginger


Slice the clean burdock root into bite size pieces. Simmer sliced root in just enough water to cover the pan but not drown the root. It’s done when root has softened, but is still crisp. Remove from heat (re-use cooked water in another recipe). Fill mason jar with root and add garlic and ginger. Next, fill jar with 1/3 tamari, 1/3 vinegar, and 1/3 water. Stone in fridge and begin to eat a couple weeks later! 


BURDOCK KIMCHI

Edible Flowers

If there's anything I have learned from making food, it's that presentation changes the whole meal! Little embellishments can really change the appeal of your meal and also add rich texture and tastes. 

Flowers can be salty, spicy or sweet. Sometimes the taste is subtle, but the addition of color and beauty makes up for it. Have fun with your food and add some flowers!

Flowers for your salad:

  • Anise Hyssop
  • Basil
  • Bachelor's Buttons/Cornflower
  • Bee Balm
  • Blueberry
  • Borage
  • Calendula
  • Carnation
  • Chamomile
  • Chickweed
  • Chives & Garlic Chives
  • Citrus
  • Dandelion
  • Daylily
  • Hibiscus
  • Hollyhock
  • Johnny Jump-Up
  • Lilac
  • Nasturtiums
  • Ox-Eye Daisy
  • Pansy
  • Peas
  • Radish
  • Redbud
  • Roses
  • Squash (especially those males!)
  • Sunflower
  • Violets
  • Zucchini


Black Walnut Dye Solution

The Black Walnut dye solution is one of my favorites. Yes, it is “another brown dye” AND it has the ability to dye various fibers various shades of brown. I’ve dyed buckskins, wool and cotton and have seen colors from a rich dark brown all the way to a brassy yellow. What more can you ask for?!

There are a few ways to make the dye solution. One way is to use the whole walnut (hull, shell and nut). Another way is to scrape the hull from the walnut shell (as mentioned here). And if you happen to scrape the hull off from the shell and nut (hopefully, saving the nut as a food source), you can either use the hulls fresh or dry them and use them at a later time. I will address making both fresh and dry dye solutions…


Fresh Hull Solution:

6 lbs. Walnuts PER 5 oz. of fiber**


Put the hulls or whole walnuts into a 5-gallong plastic bucket. Fill bucket with water until the hulls/walnuts begin to float. Cover the solution with a fitted lid and let soak for about 3 weeks. The solution will start to ferment, become dark brown and slightly sludgy. Once it gets to this point, pour the solution into a vat and bring to a boil for about one hour. Strain out the hulls/walnuts (keeping them for another dye solution), and return the liquid solution back to the heat. At this point you can add your fiber (that is washed but does NOT need a mordant) once the liquid dye is almost to a boil. Let the fiber soak in the solution on medium-low heat for 60-90 minutes. If you want a richer color, leave the fiber in the solution overnight.

After this first heating solution, you can return the strained hulls/walnuts to the liquid solution and let soak for a longer time and be re-used. When you want to dye more fiber, heat the mixture, strain, heat the liquid and dye again. This process can be repeated multiple times until you’ve exhausted the color.

**This ratio is recommended by Rebecca Burgess, author of "Harvesting Color; How to find plants and make natural dyes".

Photos by Rachael WItt

Photos by Rachael WItt

Dry Hull Solution:

This dye solution will equate to two times the size of your vat. For instance, our vat holds about 5 gallons of solution, so we are getting about 8-10 gallons of solution.


1.      Fill half of vat with dried hulls and cover with water until the vat is filled. 

2.     For the first round, bring mixture to a boil for about 30 minutes, then strain the solution (saving the hulls for another round of solution).

3.      Repeat steps 1 and 2, using the hulls from the first round.

4.     Squeeze the solution from the hulls when straining. Sometimes we will let the straining bag hang overnight and then do the second boil the following day. By letting the hulls sit and strain as well as squeezing the liquid out, we are getting a thick solution.

5.     If you are bark-tanning, you would do this process a third time. For a great article and break down on how to bark tan, click HERE (https://www.braintan.com/barktan/1basics.htm).

6.     If you are making a dye solution, you can combine the two rounds OR leave them separate and have two different color strengths of solution to dye with…

7.     Put your dye solution in a bin/container that will allow your fiber enough space to lie as flat as possible and minimize folds.

8.      Keep fiber in dye solution for a week (or more), stirring it multiple times daily.

9.     Take fiber out when color is to your liking (know that the color you are looking at will be darker because your fiber is wet.)

10.  Rinse the fiber with cold water until the water runs clear.

11.  Dry out and wear or make something!

Buckskin, before Black Walnut Dye.

Buckskin, before Black Walnut Dye.

Buckskin, after Black Walnut Dye.

Buckskin, after Black Walnut Dye.